After deal.II and PRISMS-PF are downloaded, you can run the pre-built PRISMS-PF example applications. At this time, the example applications include:
A directory for each of these apps can be found in the applications directory (i.e. phaseField/applications). The apps contain a formulation file giving the governing equations. In addition to the 24 apps listed above, some app names may be preceded by an underscore. The underscore is used to denote apps that are still under active development.
From the ''phaseField'' directory one can run the Allen-Cahn example application through to following terminal commands:
The first command moves from the ''phaseField'' directory to the directory of the Allen-Cahn example. The second command checks that core PRISMS-PF library has been compiled, (re-)compiles it if necessary, and creates a {makefile} using CMake. The third command compiles the executable in ''debug'' mode, which enables a number of exception checks in the code and adds debugging information that can be used by a debugger (e.g. gdb). The fourth command runs the program using a single processor.
As the program runs, information from each time step outputs to the terminal window. After the simulation is complete, a summary the time taken in a few major sections of the code and the total wall time is printed to the terminal window.
Here is a screenshot of typical output from CMake as you create the {makefile}:
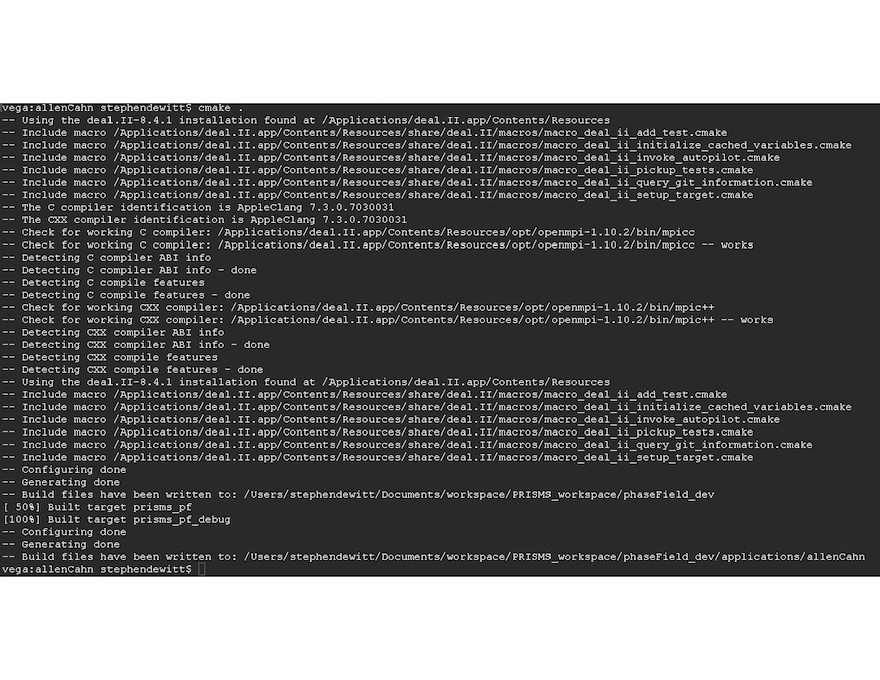
Don't worry if the output isn't exactly the same as what you see, the details of some of the messages depend on your operating system and which compilers you have installed. The important part is that the bottom three messages are ''Configuring done'', ''Generating done'', and ''Build files have been written to: ...''. In the future, entering ''$ cmake .'' will result in a shorter set of messages because CMake caches some variables from the last time it was run. As a result, you can omit the CMake step for future simulations as long as the path name to your current directory is unchanged and your installation of deal.II is unchanged.
Here is a screenshot of typical output from the compiler as you compile the executable:
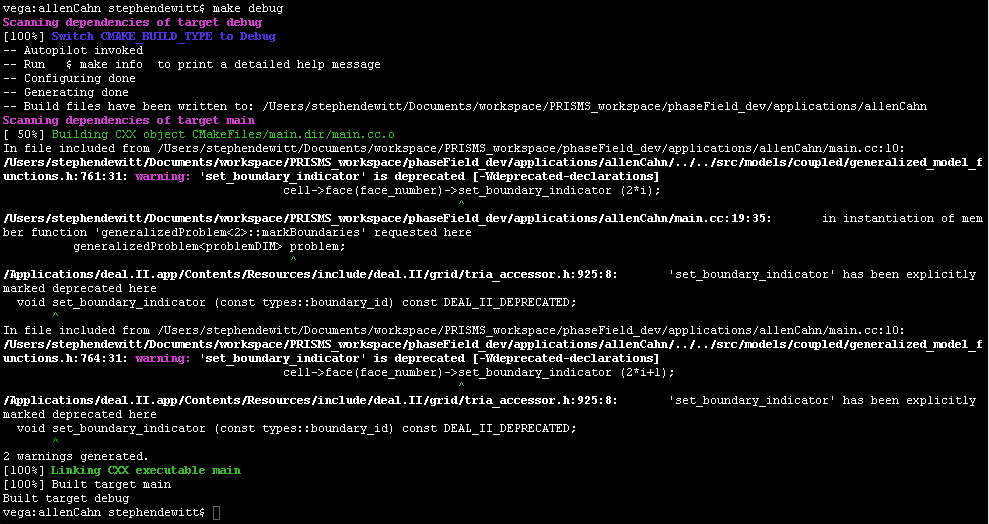
Depending on your version of deal.II, different warnings may appear as you compile. Common warnings include the use of functions that deal.II has marked as depricated (as in the screenshot above) and unused type definitions. In this case, PRISMS-PF uses these functions for backward compatability with deal.II version 8.4.x. We will switch to the updated functions in the near future.
Once the simultation is complete, the terminal output at the end of the simulation should look like:
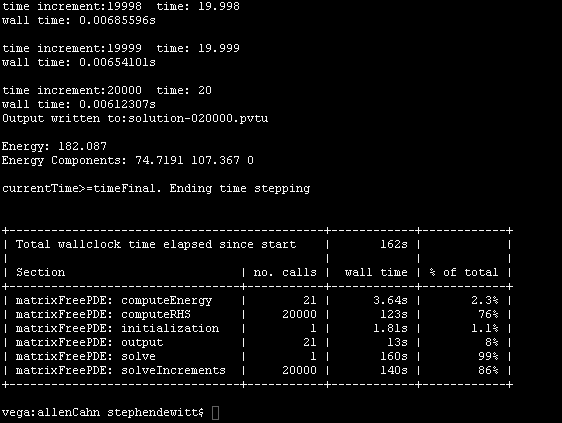
If you were able to enter all of the commands in the previous section and get output similar to the screenshots, congratulations! you just ran your first PRISMS-PF simulation. If not, you may be experiencing one of the common issues listed below.
If CMake gives an error message like this:

Then you likely forgot the period at the end of the command $ cmake ..
If CMake gives an error message like this:

CMake cannot find your installation of deal.ii. This issue is probably caused by the lack of an environment variable pointing to the directory containing your deal.II library. You can check this with the following command:
The terminal should then output the path to the deal.II library. For example in Mac OS, the deal.II directory may be ''/Applications/deal.II.app/Resources''. If DEAL_II_DIR contains a path, go there to see if deal.II is actually installed there. If DEAL_II_DIR is incorrect or empty, you should set it to the directory of the correct path of your deal.II installation with the following command:
Environment variables are erased when you close your shell. To have this path set every time you open a shell (i.e. every time you open a new terminal window), you can add the command above to your shell profile (e.g. .bashrc if you use a bash shell). If you are still having problems, there may be an issue with your deal.II installation. Please consult the deal.II website for instructions.
If CMake cannot successfully detect a C++ compiler, it will generate an error message. The most common cause for this is that the machine runs the Mac OS operating system with an outdated version of the Clang compiler. Upgrading your OS to version 10.11 or newer, updating Xcode, and (re)installing the Xcode command line tools may help. Alternatively, you can install a certain version of the deal.II package that was developed to sidestep this issue: https://github.com/dealii/dealii/releases/download/v8.3.0/dealii-8.3.0.nocxx14.dmg
Most of issues users have had are during the CMake step. If the fixes suggested above don't work for your or you have an issue not covered by this list, please contact the PRISMS-PF users list: prisms-pf-users@googlegroups.com. If you are not already on the list, please submit a join request through Google Groups or send an email with ''SUBSCRIBE'' in the subject line to prismsphasefield.dev@umich.edu. As users come across new issues, we will add them (and suggested fixes) to this section.
Once you have successfully run a simulation, you will likely want to visualize the results. PRISMS-PF output files are generated in the popular VTK format, as a series of .vtu and .pvtu files. Two common open-soure, multi-platform visualization tools for these types of files are VisIt and ParaView. Instructions for downloading this software can be found at their respective websites:
VisIt: https://wci.llnl.gov/simulation/computer-codes/visit/ \ ParaView: http://www.paraview.org/
To get you started, here is a brief tutorial on how to use VisIt to visualize your simulation results. For more detailed instructions, please consult the VisIt manual.
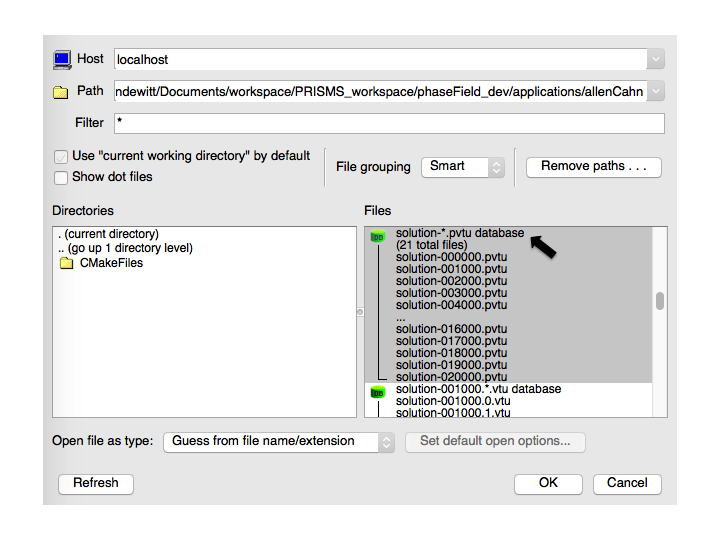
After launching the VisIt application, click ''Open'' and find the directory for the Allen Cahn example:
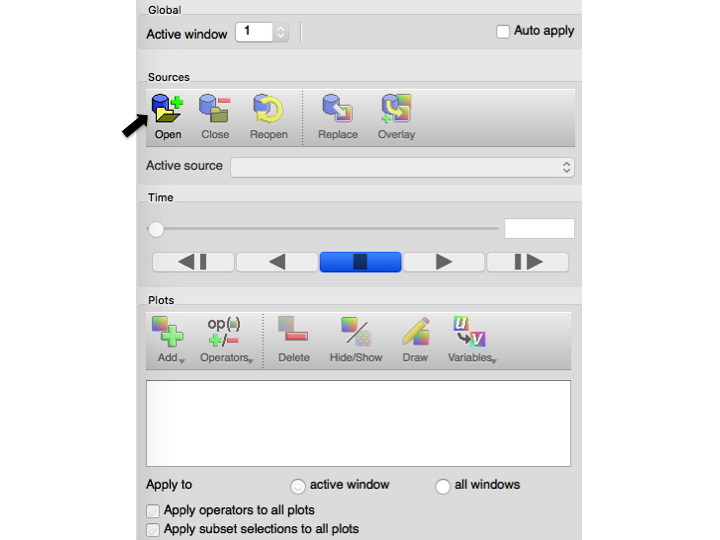
and select ''solution-*.pvtu'':
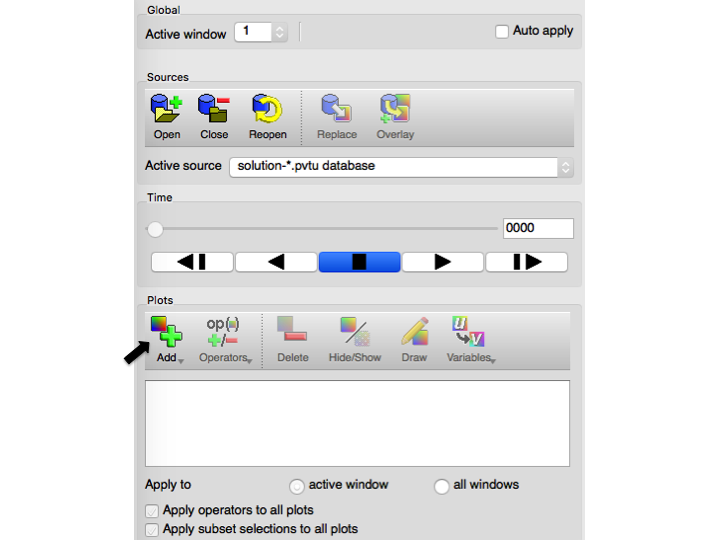
Next, click ''Add'', hover over ''Pseudocolor'', and select ''n'':
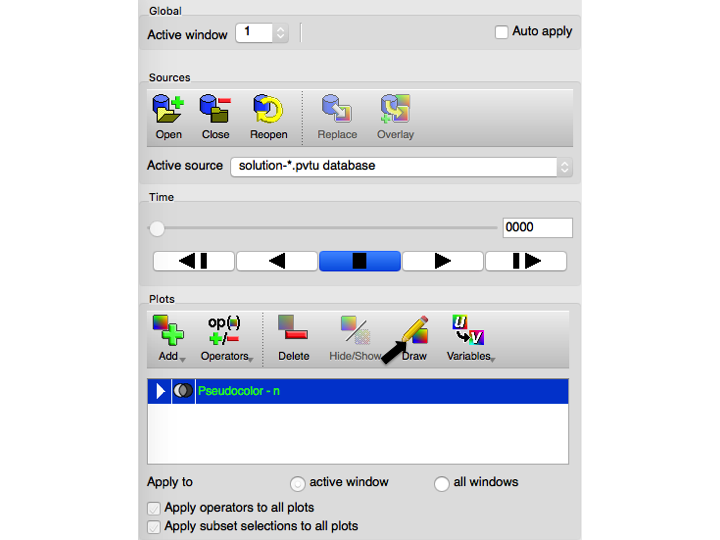
Next, click ''Draw'' to make a plot:
The VisIt window will now have a plot of the initial condition of the order parameter:
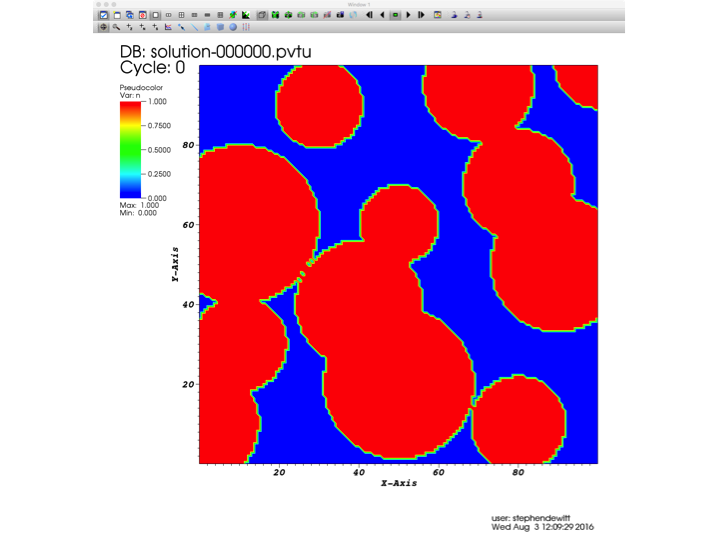
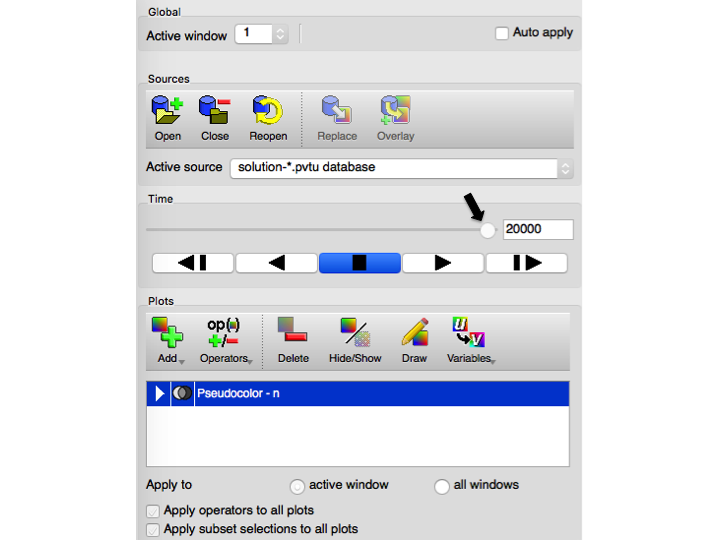
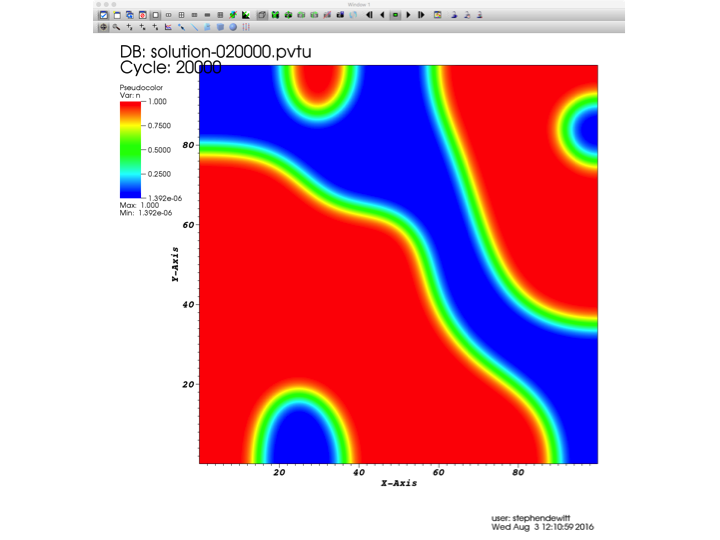
The result at other time steps can be visualized by dragging the time bar, or using the controls directly below the time bar. Dragging the time bar to the end will display the final result of the simulation:
VisIt has a wide variety of capabilities for visualizing 1D, 2D, and 3D data, including postprocessing of output fields (e.g. to obtain the result of mathematical expressions involving one or more output field). VisIt also has a powerful Python interface to provide scripting capabilities. More more instructions on how to use these, and other, features of VisIt, please consult the VisIt manual.
PRISMS-PF parses data from the input file parameters.prm as a default. However, you have the option to specify a different input file name (the extension should still be .prm). This could be useful, for example, if you want to change some of the settings of an input file but do not want to replace the original one. Suppose you want the simulation to load the input data from the file parameters_2.prm. This can be achieved by using the "-i" option:
Running the other example applications is as simple as going to the directory for the application of interest and repeating the steps in the Allen-Cahn section above. For example, to run the Cahn-Hilliard example application, when you are currently in the directory for the Allen-Cahn example application, you would type the following commands:
Once you are sure that your code works as expected, you can compile it in ''Release Mode'', which is approximately 10x faster than ''Debug Mode''. However, no exceptions are checked in Release Mode and therefore the code may compile and run even if it contains several errors. Therefore, we strongly recommend that all new code is tested in Debug Mode before switching to Release Mode. To compile in Release mode, replace $ make debug with $ make release.
One of the strengths of PRISMS-PF is that it can be run in parallel with almost no extra effort from the user. To run a simulation in parallel, replace the ''1'' in the mpirun command with the desired number of processor cores. The deal.II packages on their website already contain the MPI library, so no extra software has to be downloaded to use multiple cores.
From the directory of an example application, a simulation can be run in Release Mode on 4 cores using the following commands: